Today I have my fourth and final September Nail Challenge Collaborative look I was inspired by this look that I saw on Concrete and Nail Polish, although I did my middle stripes just slightly shorter.
Polishes Used:
-OPI - My Boyfriend Scales Walls
-Sally Hansen - Pacific Blue
-Kiss - Soft Blue
I just freehanded everything, I probably would've had crisper lines if I used tape, but I sorta like this look. And I love the colors. Simple geometric color blocking.
Let's see how the other ladies are finishing up their September NCC looks!
Showing posts with label #Kiss. Show all posts
9.25.2014
8.26.2014
Twinsie Tuesday: Sideways French
This Tuesday's theme is Sideways French. I wasn't 100% sure what that was, but I think it got it right :-P
Polishes Used:
-KB Shimmer - Eclipse
-Kiss - Silver Glitter
For this look I simply started with my black base and freehanded on some sideways French with my Kiss Nail Art striper. The look is simple but sort of edgy because of the colors I used; I liked it for something different.
Be sure to check out how the other Twinsies created their sideways French looks:
Polishes Used:
-KB Shimmer - Eclipse
-Kiss - Silver Glitter
For this look I simply started with my black base and freehanded on some sideways French with my Kiss Nail Art striper. The look is simple but sort of edgy because of the colors I used; I liked it for something different.
Be sure to check out how the other Twinsies created their sideways French looks:
Alaina at The Little Canvas
Amanda at Amandalandish
Casey at CaseyLane Loves Polish
Chelsea at Nailed Blog
ChiChi at I'm Just Me...ChiChi
Cordia at Seriously Swatched
Elizabeth at Did My Nails
Erin at Paint Those Piggies
Jessica at Blue Velvet Lacquer
Kelly at Tuxarina
Lakeisha at Refined and Polished
Lisa at The Polish Playground
Marisa at Polish Obsession
Róisín at Cuti-CLUE-les
Stephanie at A Little Polish
Traci at DrinkCitra
share this post » |
{Facebook} | {Twitter} | {Pinterest} |
Labels:
#Black,
#French,
#Glitter,
#KB Shimmer,
#Kiss,
#Twinsie Tuesday
5.06.2014
Twinsie Tuesday: Nail Appliques
This week's Twinsie Tuesday theme is Nail Appliques! You know that I love nail appliques when I'm looking for a quick look, and usually I enjoy Incoco strips, however, I don't have any at my house at the moment so I decided to try Kiss Nail Dress Strips instead!
This pattern of strips are called Be Mine. With this package you get 28 strips in numerous sizes to fit all nail shapes. These are slightly different than the Incoco strips that I have used in the past because they are not real nail polish - they are stickers. What I did like about them though, was that I had them on for a little, and decided they wouldn't be appropriate for my workday and simply peeled them off. They felt strong enough to stay on for days, but peeled off smoothly without any damage to my own nails.
I love that this pattern was so bright and fun - in real life these strips were even brighter than what my camera captured, which felt perfect for the month of May.
Check out what type of Nail Appliques the other ladies picked for their looks today!
This pattern of strips are called Be Mine. With this package you get 28 strips in numerous sizes to fit all nail shapes. These are slightly different than the Incoco strips that I have used in the past because they are not real nail polish - they are stickers. What I did like about them though, was that I had them on for a little, and decided they wouldn't be appropriate for my workday and simply peeled them off. They felt strong enough to stay on for days, but peeled off smoothly without any damage to my own nails.
I love that this pattern was so bright and fun - in real life these strips were even brighter than what my camera captured, which felt perfect for the month of May.
Check out what type of Nail Appliques the other ladies picked for their looks today!
Alaina at The Little Canvas
Amanda at Amandalandish
Amber at Nails Like Lace
Anna at Going to the Showing
Anne at Grape Fizz Nails
Casey at CaseyLane Loves Polish
Chelsea at Nailed Blog
ChiChi at I'm Just Me...ChiChi
Elizabeth at Did My Nails
Erin at Paint Those Piggies
Kelly at Tuxarina
Lakeisha at Refined and Polished
Maribeth at Obsessive Cosmetic Hoarders Unite
Marisa at Polish Obsession
Rachel at Top Coat It
Róisín at Cuti-CLUE-les
Stephanie at A Little Polish
Tiffany at Polished To Precision
Traci at DrinkCitra
share this post » |
{Facebook} | {Twitter} | {Pinterest} |
Labels:
#appliques,
#Kiss,
#Neon,
#Summer,
#Twinsie Tuesday
4.29.2014
Twinsie Tuesday: Inspired by your Hometown
This Tuesday's theme for the Twinsies is Inspired by your Hometown. If you have followed my blog for any amount of time, you know that I live in Pittsburgh, PA and that it's pretty much the best town there is :) I do Pittsburgh themed mani's all the time so I had no trouble pulling out some black and yellow and doing another.
Polishes Used:
-Zoya - Pippa
-MASH - Black
-Kiss - Silver Glitter
-Bundle Monster - BM-212
The Pittsburgh colors are black and yellow so I decided to run with that. I originally wanted to do something with a silhouette of a bridge against a yellow background, but by the time I got around to doing these on Sunday, I had already spend the day outside doing yard work and was sort of tired so I ended up going with stamping instead of trying to freehand a bridge. As you know, Pippa is the pretty much the best Pittsburgh yellow, so I had to use that for my base.
You can take a look at some of my other Pittsburgh themed looks HERE.
Make sure to see the other Twinsie's hometown looks and learn a little more about them while you're at it.
Polishes Used:
-Zoya - Pippa
-MASH - Black
-Kiss - Silver Glitter
-Bundle Monster - BM-212
The Pittsburgh colors are black and yellow so I decided to run with that. I originally wanted to do something with a silhouette of a bridge against a yellow background, but by the time I got around to doing these on Sunday, I had already spend the day outside doing yard work and was sort of tired so I ended up going with stamping instead of trying to freehand a bridge. As you know, Pippa is the pretty much the best Pittsburgh yellow, so I had to use that for my base.
You can take a look at some of my other Pittsburgh themed looks HERE.
Make sure to see the other Twinsie's hometown looks and learn a little more about them while you're at it.
Alaina at The Little Canvas
Amanda at Amandalandish
Amber at Nails Like Lace
Anna at Going to the Showing
Anne at Grape Fizz Nails
Casey at CaseyLane Loves Polish
Chelsea at Nailed Blog
ChiChi at I'm Just Me...ChiChi
Elizabeth at Did My Nails
Erin at Paint Those Piggies
Kelly at Tuxarina
Lakeisha at Refined and Polished
Maribeth at Obsessive Cosmetic Hoarders Unite
Marisa at Polish Obsession
Rachel at Top Coat It
Róisín at Cuti-CLUE-les
Stephanie at A Little Polish
Tiffany at Polished To Precision
Traci at DrinkCitra
share this post » |
{Facebook} | {Twitter} | {Pinterest} |
Labels:
#Black&Yellow,
#Bundle Monster,
#Kiss,
#MASH,
#Pittsburgh,
#Twinsie Tuesday,
#Zoya
3.18.2014
Twinsie Tuesday: Tip Nail Art
Today's theme in Twinsie Tuesday's is Tip Nail Art. At first, I thought that this may be a good opportunity to try stamping tips and use all those images I never used. But then I realized, I can't stamp straight so I figured I better stick to something else, and I am glad I did, I love the look I created!
Polishes Used:
-OPI - I Think In Pink
-Kiss - Beach Pink
-Yellow Rhinestones
I love how this look turned out! The tone on tone with the pinks and then the yellow accents, it's just fun and springy and pretty, in my opinion. I saw a similar look on Pinterest here and made it my own using the pinks (instead of traditional French) and the rhinestones (instead of glequins).
What do you think of this look? Something you could rock? Switch up the colors? Love it? Hate it?
Check out what my other Twinsies are rocking on their tips today!
Polishes Used:
-OPI - I Think In Pink
-Kiss - Beach Pink
-Yellow Rhinestones
I love how this look turned out! The tone on tone with the pinks and then the yellow accents, it's just fun and springy and pretty, in my opinion. I saw a similar look on Pinterest here and made it my own using the pinks (instead of traditional French) and the rhinestones (instead of glequins).
What do you think of this look? Something you could rock? Switch up the colors? Love it? Hate it?
Check out what my other Twinsies are rocking on their tips today!
Alaina at The Little Canvas
Amanda at Amandalandish
Amber at Nails Like Lace
Anna at Going to the Showing
Anne at Grape Fizz Nails
Casey at CaseyLane Loves Polish
Chelsea at Nailed Blog
ChiChi at I'm Just Me...ChiChi
Elizabeth at Did My Nails
Erin at Paint Those Piggies
Heather at Peace, Love, & Polish
Kelly at Tuxarina
Lakeisha at Refined and Polished
Maribeth at Obsessive Cosmetic Hoarders Unite
Marisa at Polish Obsession
Rachel at Top Coat It
Róisín at Cuti-CLUE-les
Stephanie at A Little Polish
Tiffany at Polished To Precision
share this post » |
{Facebook} | {Twitter} | {Pinterest} |
Labels:
#French,
#Kiss,
#OPI,
#Pink,
#Rhinestones,
#Twinsie Tuesday
1.08.2014
The Nail Challenge Collaborative Presents - Inspired By A Tutorial - Week 1
This month's theme in the Nail Challenge Collaborative in Inspired by a Tutorial. I voted for this theme, because there are so many pretty looks out there with tutorials that I always "pin", or "like", and think, I need to try that; so here is my opportunity.
For this first mani, I decided to follow this tutorial from Lunaloveschocolate on Instagram. While my look is a little different (she has nice long nails, so I sort of ran out of room) it definitely started out following the tutorial step for step.
Polishes Used:
-OPI - Alpine Snow
-Kiss - Beach Pink
-China Glaze - For Audrey
-Mash - Black
-Hard Candy - Matte-ly In Love
When I started out I hadn't really expected this to be a bright pink and black look but that's sort of where it ended up; haha. Oh well. I think you can see how Luna's mani has inspired mine. (side note, I'm surprised how well this actually showed up as "neon" in my pictures, I usually have a hard time capturing neon)
What do you think of this look? P.S. If you aren't following Lunaloveschocolate on Instagram, you are missing out, she has some awesome looks!
Don't forget to check out what the other ladies of the NCC did and who they were inspired by, maybe it was you!
For this first mani, I decided to follow this tutorial from Lunaloveschocolate on Instagram. While my look is a little different (she has nice long nails, so I sort of ran out of room) it definitely started out following the tutorial step for step.
Polishes Used:
-OPI - Alpine Snow
-Kiss - Beach Pink
-China Glaze - For Audrey
-Mash - Black
-Hard Candy - Matte-ly In Love
When I started out I hadn't really expected this to be a bright pink and black look but that's sort of where it ended up; haha. Oh well. I think you can see how Luna's mani has inspired mine. (side note, I'm surprised how well this actually showed up as "neon" in my pictures, I usually have a hard time capturing neon)
What do you think of this look? P.S. If you aren't following Lunaloveschocolate on Instagram, you are missing out, she has some awesome looks!
Don't forget to check out what the other ladies of the NCC did and who they were inspired by, maybe it was you!
share this post » |
{Facebook} | {Twitter} | {Pinterest} |
12.15.2013
Crumpet's Nail Tarts Christmas Winter Challenge - Christmas Traditions
Today's theme is Christmas Traditions. I wasn't really sure what to do for this theme, but I ended up doing Presents. We always exchange presents on Christmas morning and I love getting gifts for my family.
Here is my look!
Polishes Used:
-China Glaze - Ruby Pumps
-Kiss - White
-Rhinestones
-Gelous
I am not 100% in love with this look (as I am horrible at freehanding curves) but it is not that bad and I think it's pretty clear what look I was going for.
On a side note, I can't wait until Christmas morning to give me family their gifts as I think I got them all presents that they will really like :)
Don't forget to check out the other ladies' Christmas Traditions looks!
Here is my look!
Polishes Used:
-China Glaze - Ruby Pumps
-Kiss - White
-Rhinestones
-Gelous
I am not 100% in love with this look (as I am horrible at freehanding curves) but it is not that bad and I think it's pretty clear what look I was going for.
On a side note, I can't wait until Christmas morning to give me family their gifts as I think I got them all presents that they will really like :)
Don't forget to check out the other ladies' Christmas Traditions looks!
share this post » |
{Facebook} | {Twitter} | {Pinterest} |
11.18.2013
Nail Art For Nubs Link-Up
I know it's only been 4 weeks but I am glad that I'm sticking with the Nail Art for Nubs Link-up. I also know we were able to generate some interest from other short nailed ladies so you may be seeing even more manis in the link-ups soon!
Polishes Used:
-Kiss Marbleizing Polish & Pen Kit
-Out The Door
For this week's look I used another Kiss Nail Art Set; this time, the Marbleizing Polish & Pen Kit (you can check it out here), but you don't need the kit to create this look. All you need is 3 or 4 polishes of similar colors, the colors I used were all purple but adding pink or white or blue in this look would have looked really pretty as well. All you need to do it paint a base color, and while it's still wet add dabs of polish in the other colors and then use a toothpick or pin to swirl them together. I think I was pushing down too hard with the pen though because I sort of scrapped the bottom color off at points; however, once I added the top coat is easily smoothed everything out!
I hope you enjoy this look and make sure to check out what the other ladies did (and let me know if this look inspires you to try something similar)
Polishes Used:
-Kiss Marbleizing Polish & Pen Kit
-Out The Door
For this week's look I used another Kiss Nail Art Set; this time, the Marbleizing Polish & Pen Kit (you can check it out here), but you don't need the kit to create this look. All you need is 3 or 4 polishes of similar colors, the colors I used were all purple but adding pink or white or blue in this look would have looked really pretty as well. All you need to do it paint a base color, and while it's still wet add dabs of polish in the other colors and then use a toothpick or pin to swirl them together. I think I was pushing down too hard with the pen though because I sort of scrapped the bottom color off at points; however, once I added the top coat is easily smoothed everything out!
I hope you enjoy this look and make sure to check out what the other ladies did (and let me know if this look inspires you to try something similar)
share this post » |
{Facebook} | {Twitter} | {Pinterest} |
Labels:
#Dry Marble,
#Kiss,
#Nail Art for Nubs,
#Out The Door,
#Purple
11.17.2013
Kiss - Gradation Polishes
| http://www.kissusa.com/nails/nail_art/gradation_kit#.UobGxbQo7IU |
The set that I received was the Film Noir color which came with a silver base color, a black/gray jelly second color and a black/silver glitter for the third color. Overall, I am pretty impressed with these sets. Since the polishes are somewhat jelly they lend themselves to gradients and are definitely a lot easier than doing a sponging gradient with cream polishes. I would recommend these kits to fellow polish lovers of all skill levels :)
Have you tried out the Kiss Gradation Kit yet?
share this post » |
{Facebook} | {Twitter} | {Pinterest} |
Labels:
#Gradation Polishes,
#Gradient,
#Influenster,
#Kiss,
#Review
10.18.2013
The Nail Challenge Collaborative Presents - Halloween Month - Week 2
TGIF! I am back in action with my second Halloween Mani as part of the October Nail Challenge Collaborative. I am much happier with today's look than the first one I did for the challenge and I even decided to add a little festive shapes into my photos lol.
Polishes Used:
-Liquid Lacquer - Wednesday
-Kiss - White
-Finger Paints - Master Muse
-Finger Paints - Caric-Art-Ure
-Out The Door
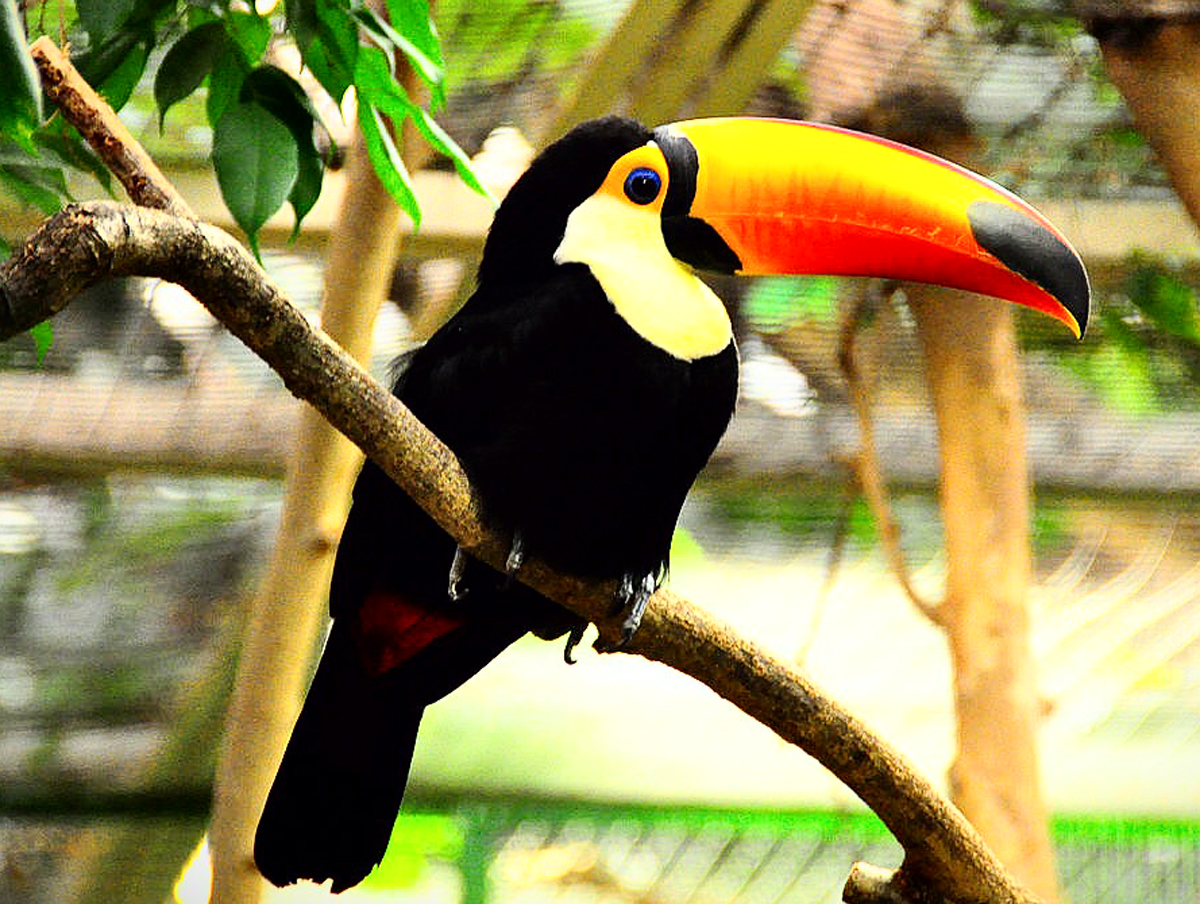
For this lok I decided to do one my favorite drip / tie die / striped gradient looks and was inspired by the colors in candy corn. I know this isn't the color order that candy corn comes in but since I used jelly shades for the yellow and orange, I had to go lightest to darkest. It also sort of reminds me of a toucan. LOL
What do you think? Halloween or Toucan? lol. Either way, I am overall pleased with this look :)
Polishes Used:
-Liquid Lacquer - Wednesday
-Kiss - White
-Finger Paints - Master Muse
-Finger Paints - Caric-Art-Ure
-Out The Door
For this lok I decided to do one my favorite drip / tie die / striped gradient looks and was inspired by the colors in candy corn. I know this isn't the color order that candy corn comes in but since I used jelly shades for the yellow and orange, I had to go lightest to darkest. It also sort of reminds me of a toucan. LOL
![]() |
| Source: http://images2.wikia.nocookie.net/__cb20110313104421/rio/images/1/17/Toucan_toco.jpg |
share this post » |
{Facebook} | {Twitter} | {Pinterest} |
Subscribe to:
Posts (Atom)


share this post »